How to Organize Under the Kitchen Sink: A Professional Organizer’s 7-Step Method
Written by Carol Appelbaum, founder of Luxury Pro Organizer
Houston professional organizer specializing in luxury home organization, kitchen organization, professional packing, and customized organizing.
The best way to organize under the kitchen sink is to remove everything, group similar supplies together, discard products and tools you no longer use, clean the cabinet, and return only the essentials in clearly defined categories. This creates an efficient cleaning station rather than an overcrowded cabinet filled with forgotten products.
I recently shared my professional organizing advice with Homes & Gardens for its article, “How to Declutter Under the Kitchen Sink—Expert Tips for Streamlining Cleaning Supplies.”
As I explained in the article, “The first step is to empty the area so you can see exactly what you’re dealing with.”
That step may sound simple, but it is the foundation of a well-organized under-sink cabinet. You cannot make thoughtful decisions or choose the right organizing products while everything is still crowded inside the space.
Here is the method I use to transform this notoriously awkward cabinet into a functional, easy-to-maintain part of the kitchen.
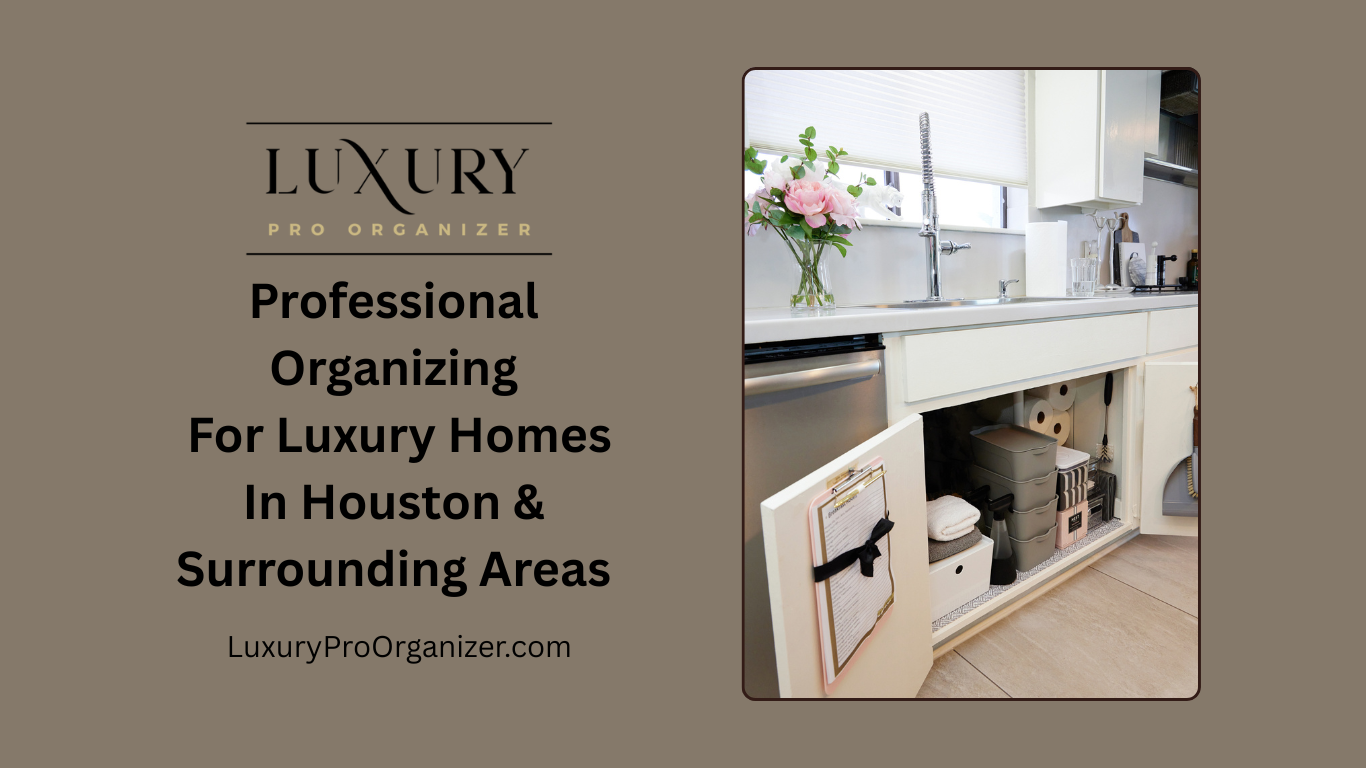
Why Does the Cabinet Under the Kitchen Sink Become So Cluttered?
The space under the kitchen sink is one of the most challenging storage areas in the home. Plumbing reduces the usable space, the cabinet may be unusually deep, and products are often pushed behind one another where they become difficult to see.
It also tends to become the default location for almost anything related to cleaning:
Multipurpose sprays
Dishwashing products
Specialty cleaners
Sponges and scrub brushes
Microfiber cloths
Dishwasher tablets
Trash bags
Disposable gloves
Furniture polish
Pest-control products
Cleaning tools purchased for one specific problem
When these items are placed under the sink without defined categories, it becomes easy to forget what you already own. This leads to duplicate purchases, expired products, leaking bottles, and tools that occupy valuable space without being used.
An organized kitchen should make everyday routines feel easier. That principle guides all of our Houston home-organizing services, from one challenging cabinet to an entire kitchen or pantry.
Step 1: Remove Everything From Under the Sink
Begin by taking every item out of the cabinet. Do not try to organize around the products that are already there.
Place everything on a protected counter, table, or floor where you can see the entire collection at once. Completely emptying the cabinet allows you to:
See how many products you actually own
Find duplicates
Notice leaking or damaged containers
Check the condition of the cabinet
Look for moisture, plumbing leaks, or staining
Measure the usable space accurately
This is also an opportunity to vacuum loose debris and inspect the area around the pipes before adding containers or shelf systems.
At Luxury Pro Organizer, we organize spaces by first understanding what needs to live there and how the client actually uses it. The organizing products come later.
Step 2: Group Similar Cleaning Supplies Together
Once everything is visible, create categories before deciding what to keep.
For example:
Everyday multipurpose cleaners
Dishwashing supplies
Dishwasher products
Glass and stainless-steel cleaners
Stone or specialty-surface products
Furniture and wood-care products
Sponges and scrubbing tools
Microfiber cloths
Trash bags and disposable gloves
Grouping like items together immediately reveals duplicates and makes larger categories easier to evaluate.
You may discover that you own four multipurpose sprays, several nearly empty bottles of dish soap, or specialty cleaners you have not used in years. These items are harder to recognize when they are scattered throughout the cabinet.
Categorizing also prevents unnecessary purchases because you can see exactly what you have and what is running low.
Step 3: Check Every Product Before Keeping It
Examine each bottle, can, and container individually.
Ask:
Do I use this product regularly?
Is it appropriate for a surface in my home?
Is it expired or no longer effective?
Is the label still readable?
Is the container leaking, rusted, cracked, or damaged?
Would I purchase this product again today?
Did I remember that I owned it?
An old bottle of polish that has not been used in years does not deserve valuable kitchen storage. Neither does a rusted aerosol can, an unidentifiable solution, or a cleaner purchased for a surface you no longer have.
Be honest about what supports your current home and cleaning routine, not the routine you imagined when you bought the product.
Dispose of cleaning products responsibly
Do not automatically pour unwanted cleaning solutions down the sink, combine partially used products, or transfer chemicals into unmarked containers.
Read the manufacturer’s label and follow local guidelines for disposal. Certain corrosive, toxic, reactive, or flammable household products may require special handling. Never mix cleaning chemicals together, even when the containers appear nearly empty.
Step 4: Be Ruthless With Cleaning Tools
Bottles are not the only source of under-sink clutter. Sponges, brushes, cloths, gloves, and single-purpose cleaning gadgets can consume just as much space.
Remove:
Grimy or deteriorating sponges
Fraying dishcloths
Brushes with crushed or dirty bristles
Torn gloves
Tools that do not work as promised
Duplicate scrubbers
Single-purpose gadgets you never reach for
Keep the tools you use consistently and that perform their job well. You do not need a large collection of stained cloths when a small group of clean, dependable microfiber cloths will work better.
Having fewer tools also makes it easier to keep them clean, dry, and accessible.
Step 5: Clean the Cabinet and Every Product You Are Keeping
Before returning anything to the cabinet, clean the interior thoroughly. Wipe the base, sides, door, and accessible areas around the plumbing.
Make sure the cabinet is completely dry before adding storage products.
Then wipe the bottom and exterior of every bottle you plan to keep. This small step prevents sticky residue, grime, and rings from being transferred back into the freshly cleaned cabinet.
If you notice persistent moisture, swelling, staining, mold, or a musty odor, investigate the source before reorganizing. Storage products should never be used to conceal an active plumbing or moisture problem.
Step 6: Measure Before Buying Organizing Products
Under-sink cabinets are not standardized open boxes. Pipes, garbage disposals, water-filtration systems, electrical components, and cabinet hinges can all affect which products will fit.
Measure:
The interior width
The interior height
The cabinet depth
The space on each side of the plumbing
The distance between the pipes and cabinet floor
The clearance needed for hinges and doors
IMPORTANT TO NOTE: If you plan to use a drawer system, will you be able to pull the drawer out? Is there a cabinet trim across the bottom of the cabinet or a cabinet door hinge?
Do not purchase an organizing product simply because it is labeled “under-sink organizer.” The best product is the one that fits your particular cabinet and supports the categories you actually need to store.
Our professional organizing process prioritizes function before product selection. Containers should solve a specific storage problem, not create another layer of clutter.
Step 7: Create Simple, Easy-to-Maintain Zones
After decluttering, assign each category a defined home.
A practical system might include:
One portable caddy for everyday cleaning sprays
One bin for dishwashing supplies
One container for dishwasher tablets
One ventilated caddy for clean, dry scrubbing tools
One narrow bin for folded microfiber cloths
One dispenser or contained area for trash bags
Avoid creating too many tiny categories. A system can look beautiful on the day it is installed but still fail if it is too complicated for the household to maintain.
Broad, intuitive categories usually work best. Everyone in the home should be able to find a product and return it without needing detailed instructions.
You can view real kitchens and customized storage systems in the Luxury Pro Organizer kitchen gallery.
What Should Not Be Stored Under the Kitchen Sink?
The answer depends on the household, cabinet conditions, and local safety recommendations, but this space may not be appropriate for:
Food or pet food
Paper products that can absorb moisture
Valuable or irreplaceable items
Products in leaking or damaged containers
Unlabeled cleaning solutions
Items that could be dangerous to children or pets
Excess backstock that prevents access to plumbing
If children or pets can access the cabinet, use appropriate safety measures and follow every product’s storage instructions. Hazardous products may need to be stored in a more secure location.
How Do You Keep the Space Organized?
An under-sink cabinet stays organized when its capacity is respected.
Try these simple maintenance habits:
Return products to their assigned category.
Do not purchase a replacement until the current product is nearly empty.
Avoid collecting multiple products that perform the same job.
Wipe bottle bottoms before returning them.
Allow damp sponges and cloths to dry properly.
Check occasionally for leaks or spills.
Review the entire cabinet every few months.
If a category no longer fits comfortably inside its assigned container, that is a sign to edit the category, not immediately purchase a larger bin.
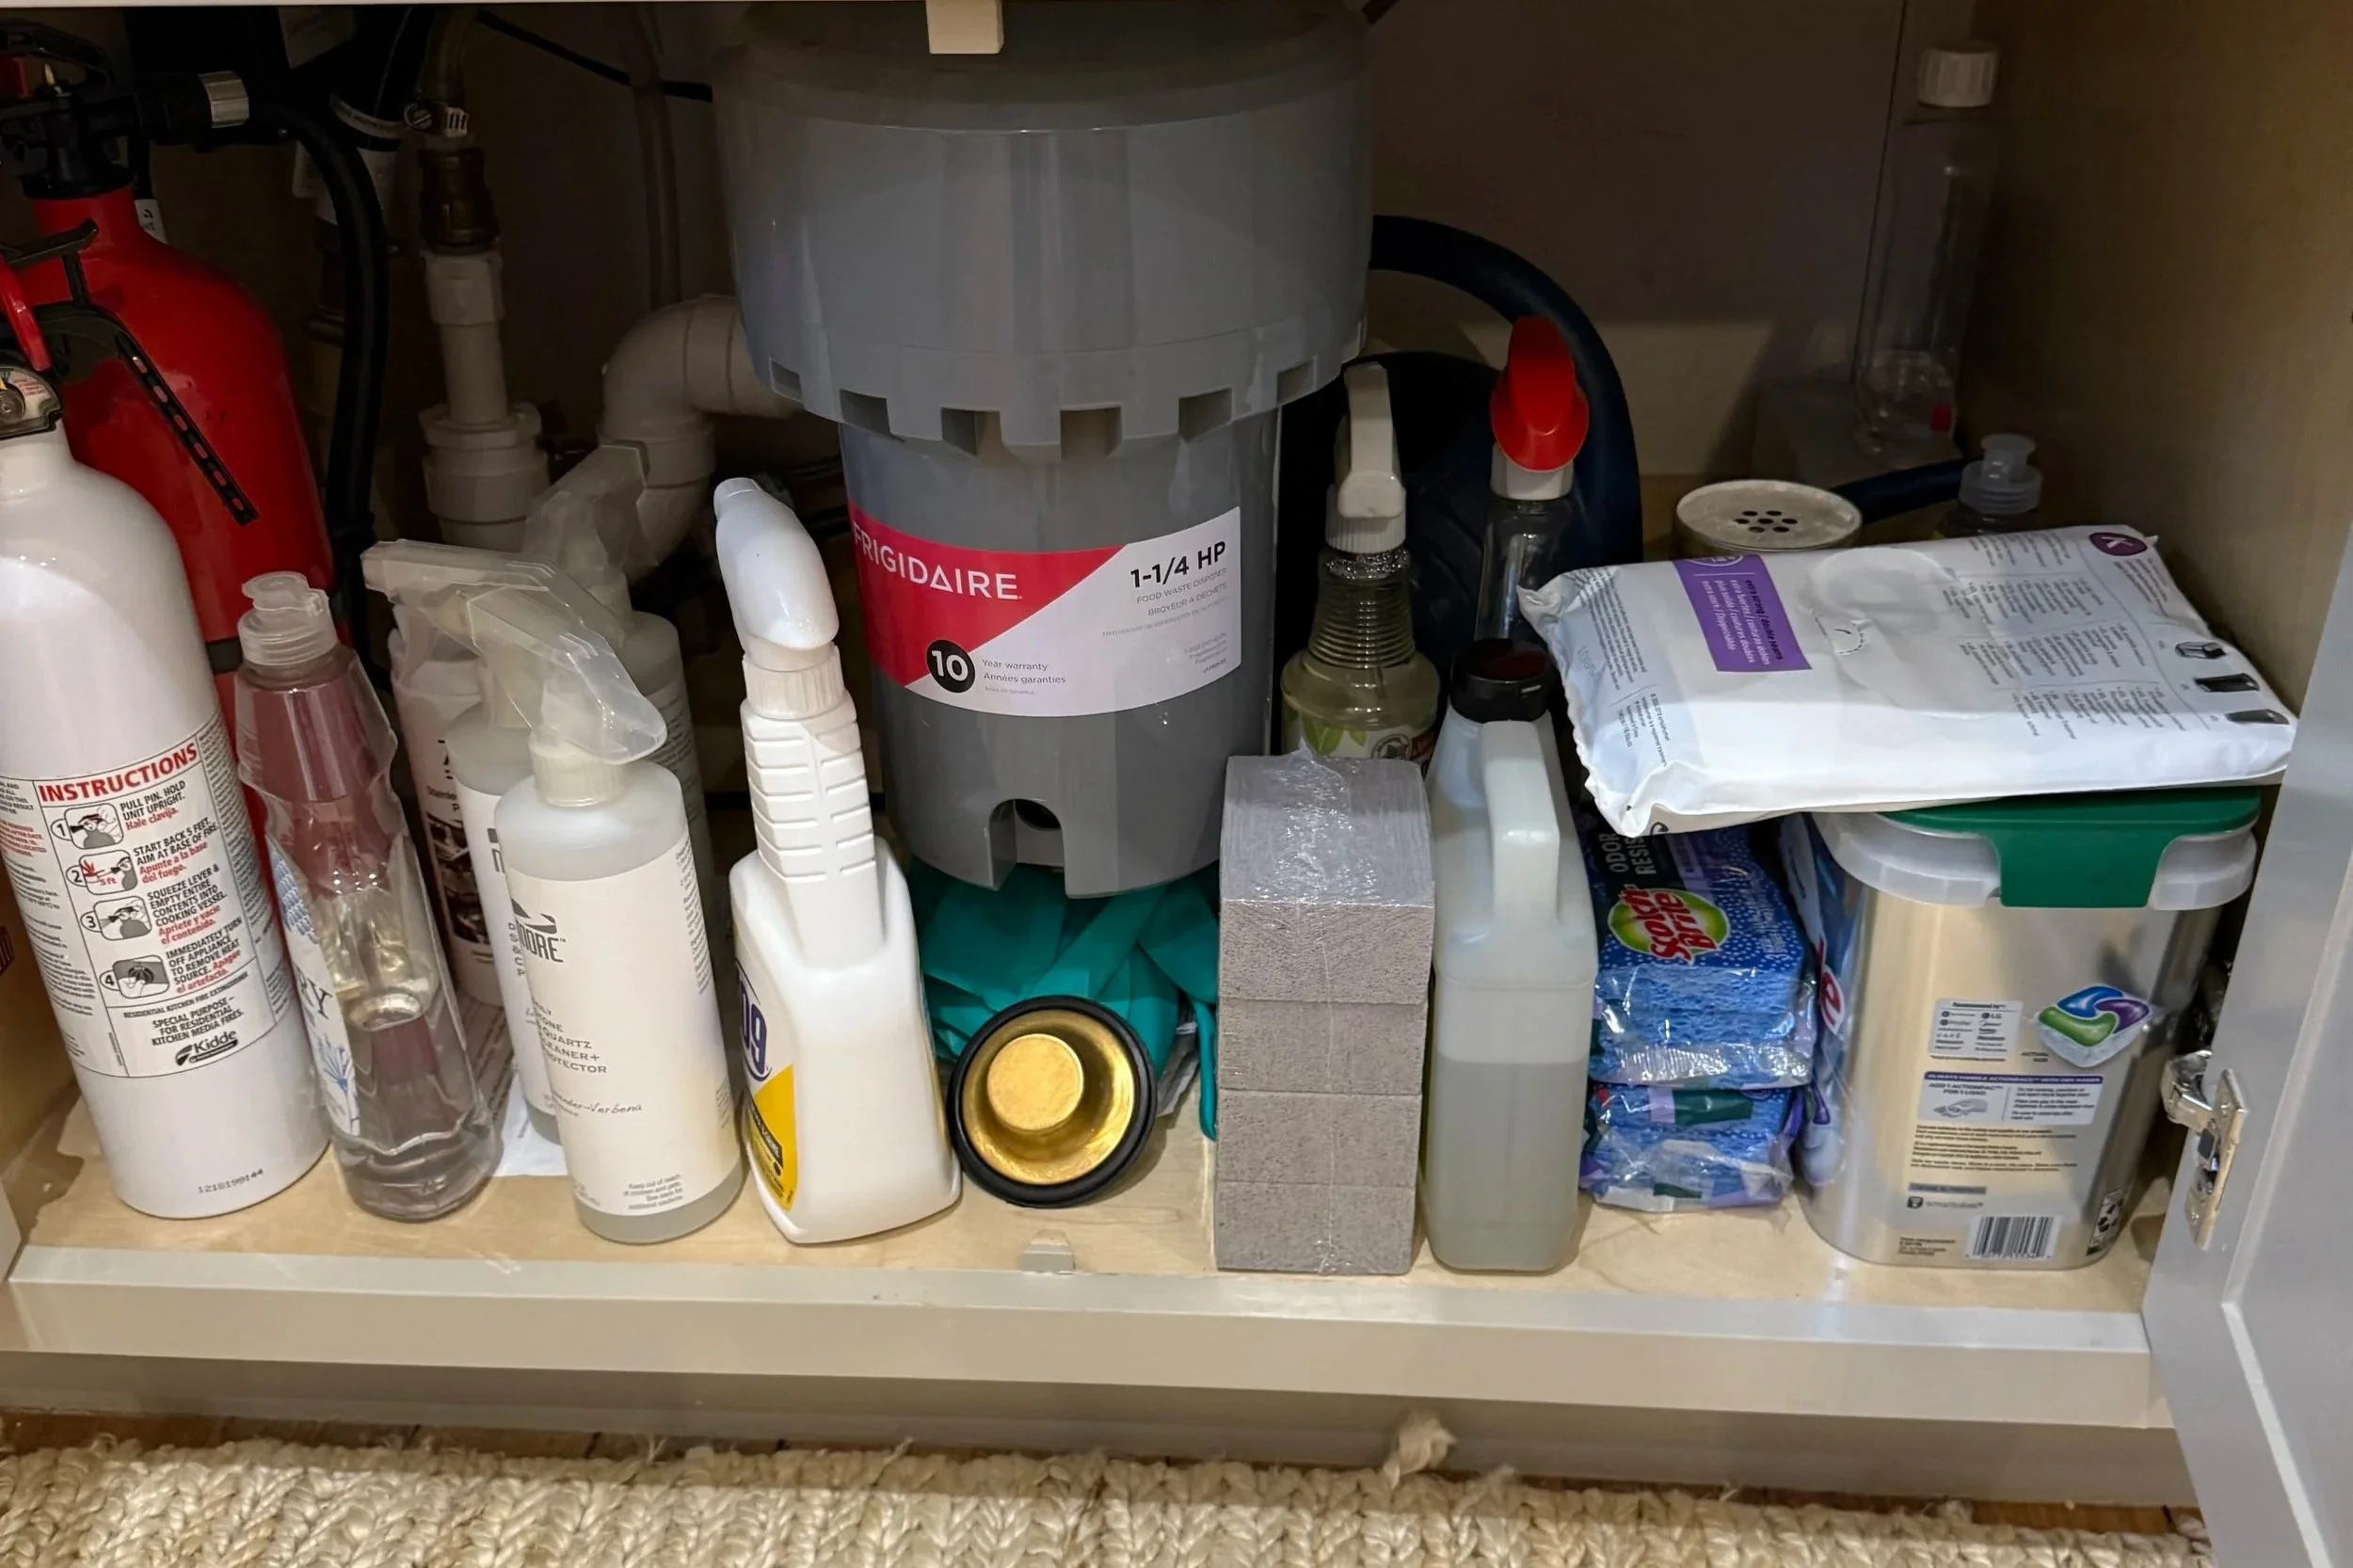
BEFORE Luxury Pro Organizer
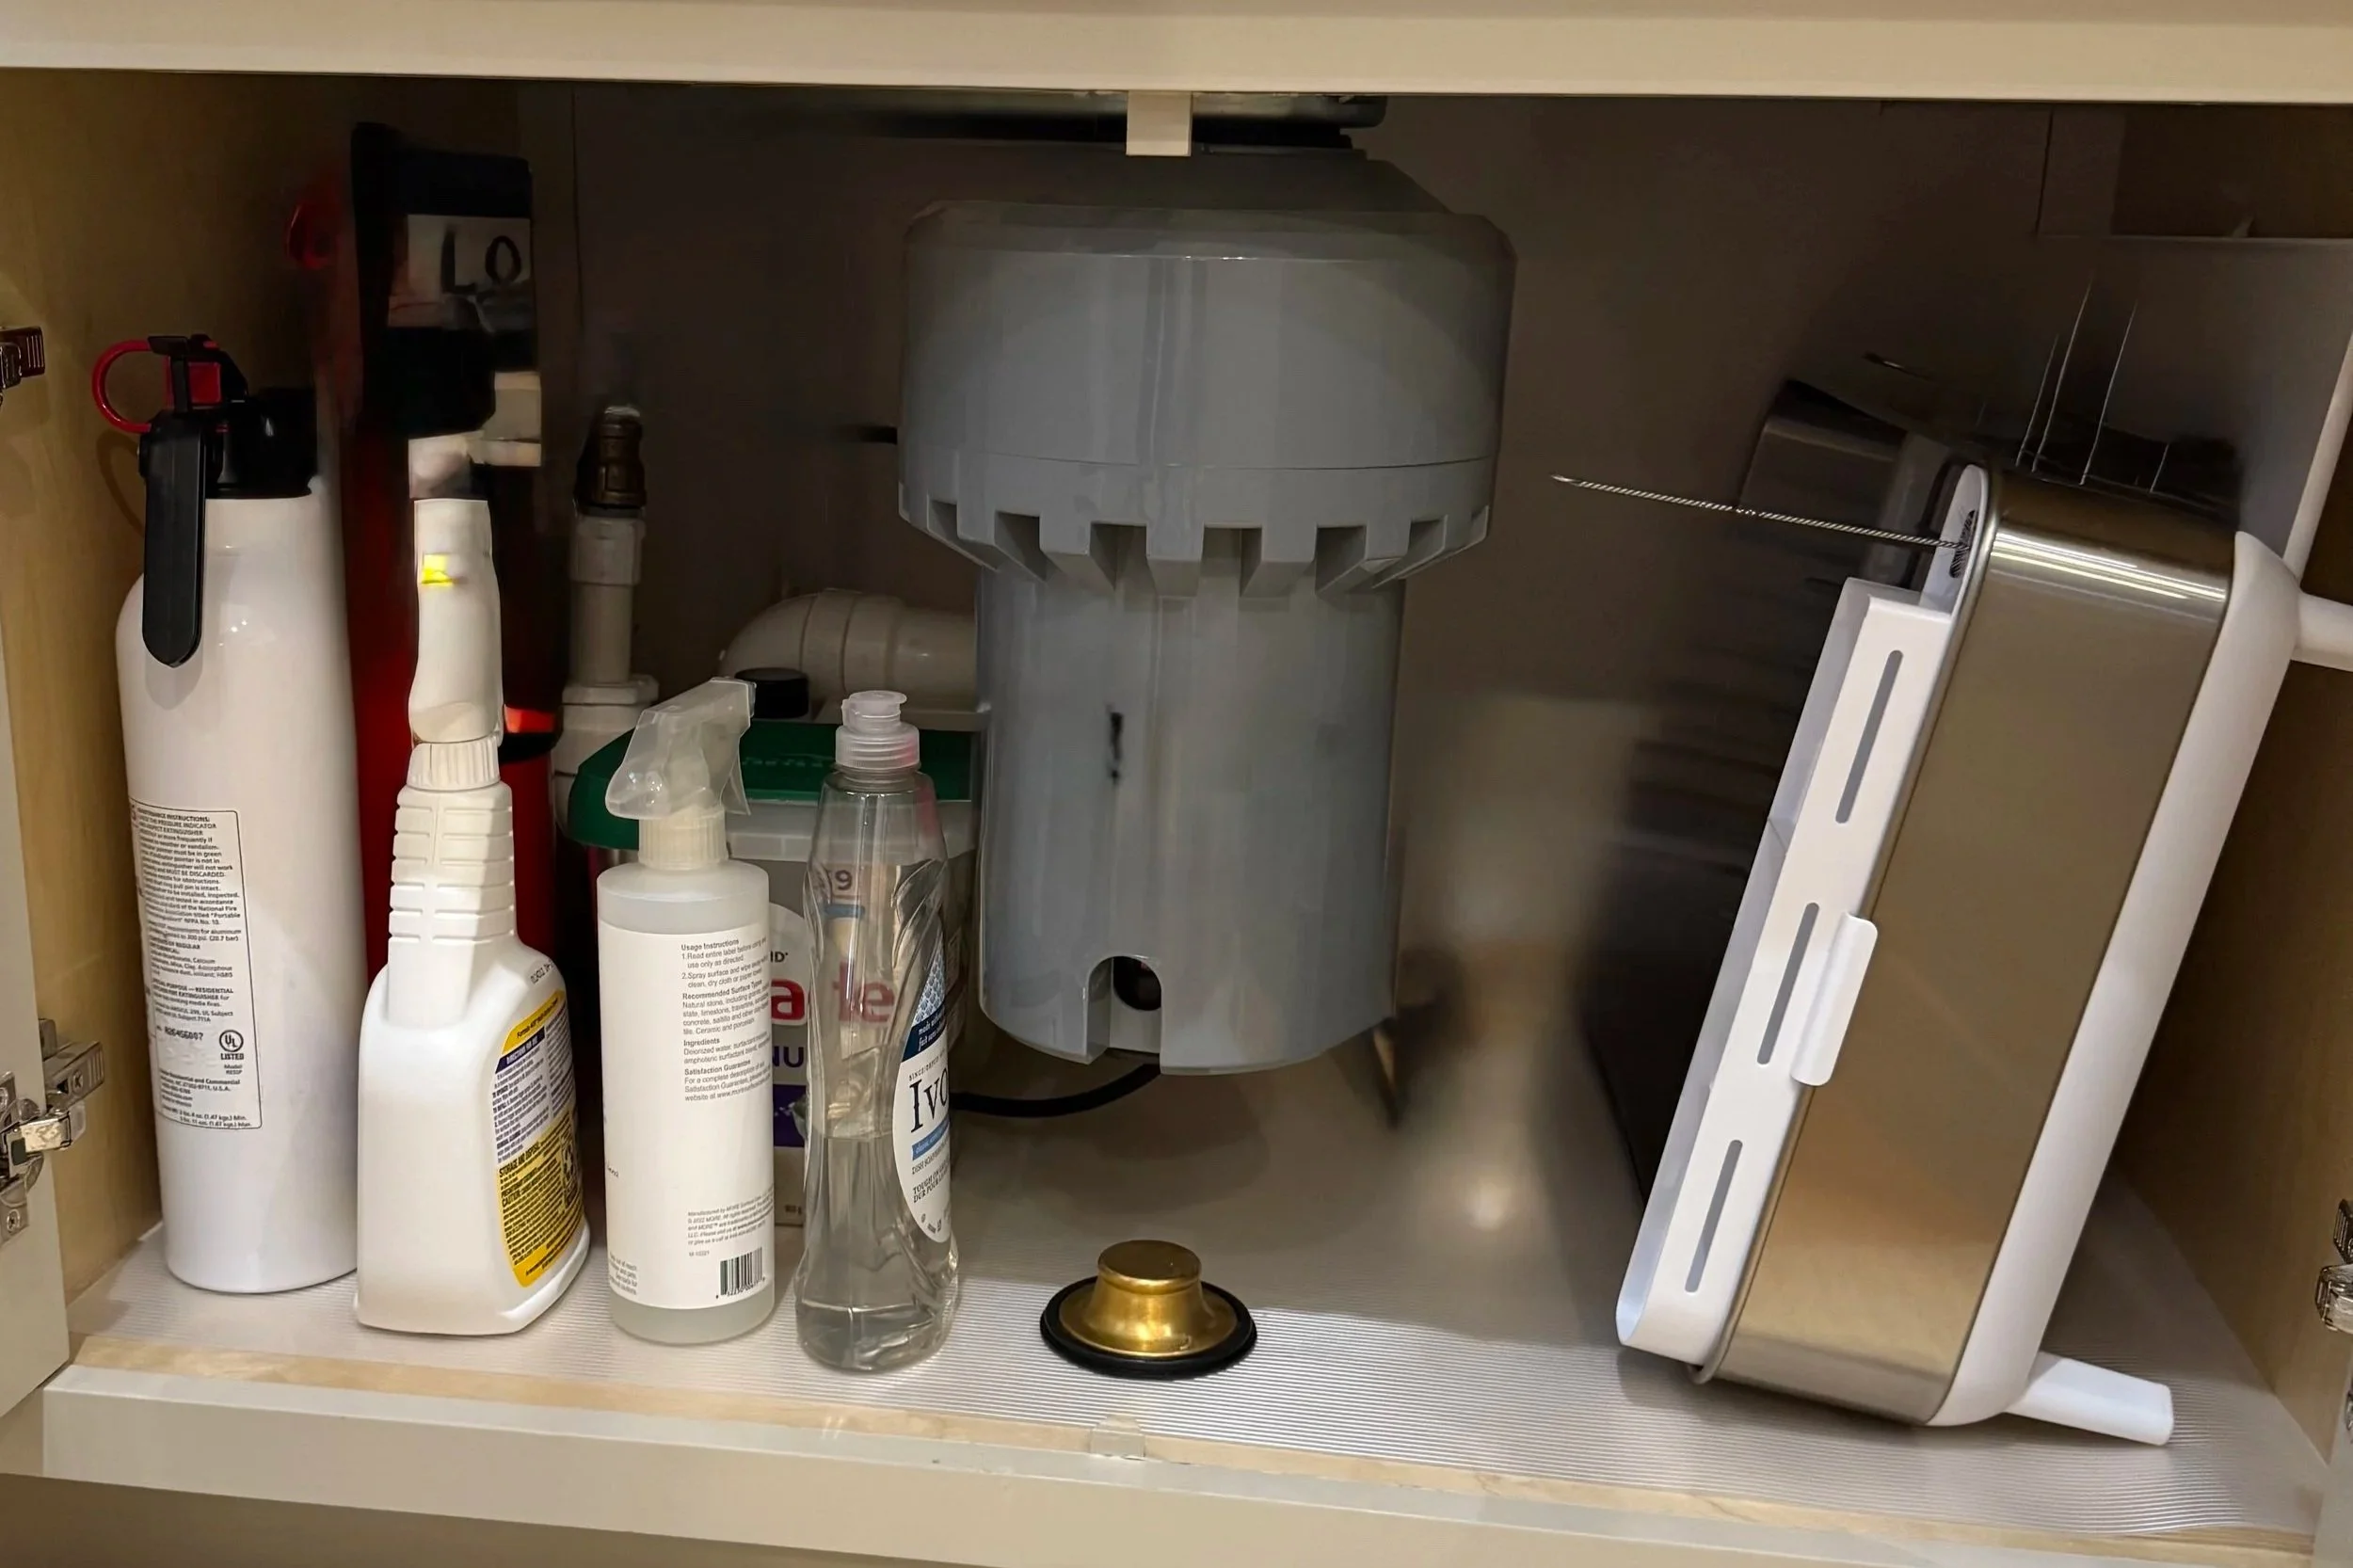
AFTER Luxury Pro Organizer
Frequently Asked Questions
What is the first step in organizing under the kitchen sink?
Remove everything from the cabinet. This allows you to inspect the space, see the full volume of products you own, find duplicates, and create categories before purchasing organizing containers.
How should cleaning supplies be grouped?
Group products according to how they are used. Useful categories include everyday cleaners, dishwashing supplies, specialty-surface products, dishwasher products, scrubbing tools, and microfiber cloths.
Can cleaning products expire?
Some cleaning and disinfecting products lose effectiveness over time. Check the printed expiration date and manufacturer’s guidance. Remove products with damaged containers, unreadable labels, rust, leaks, or significant deterioration.
Should sponges be stored under the sink?
Clean, dry sponges can be stored in a ventilated container under the sink. Avoid placing soaking-wet sponges into a closed bin, where moisture and odors can accumulate.
Are pullout organizers good for under the kitchen sink?
They can be very effective when properly measured around the plumbing and other fixtures. A poorly fitted product may block access to pipes or waste valuable space, so measure the cabinet before buying anything.
IMPORTANT TO NOTE: If you plan to use a drawer system, will you be able to pull the drawer out? Is there a cabinet trim across the bottom of the cabinet or a cabinet door hinge?
A Small Space That Can Improve Your Entire Routine
The area under the kitchen sink may be small, but it supports tasks performed throughout the home. When products are edited, grouped, and easy to retrieve, cleaning becomes simpler and duplicate purchases become less likely.
An effective organizing system is not about fitting the largest possible number of products into a cabinet. It is about keeping the right products in a space designed to support the way you live.
My under-sink decluttering advice was featured by Homes & Gardens as part of its expert guide to streamlining cleaning supplies. You can read the complete Homes & Gardens article and explore additional national media features on the Luxury Pro Organizer Press page.
Exclusive
10 Smart Ways to Save Money Before Hiring a Luxury Professional Organizer
Hiring a luxury organizer is a big leap, but we’re here to make it easier. Our free guide, "10 Smart Ways to Save Money Before Hiring a Luxury Professional Organizer," is packed with practical tips to help you:
Prepare your space to reduce costs.
Declutter and purge efficiently.
Maximize your budget before your session begins.
Even if you’re busy or overwhelmed, we’re ready to meet you wherever you are and create a stress-free, customized experience.
Explore our complete project gallery.
Ready to create a more beautiful and functional kitchen? Contact Luxury Pro Organizer to discuss professional kitchen, pantry, or whole-home organization in Houston and the surrounding communities.